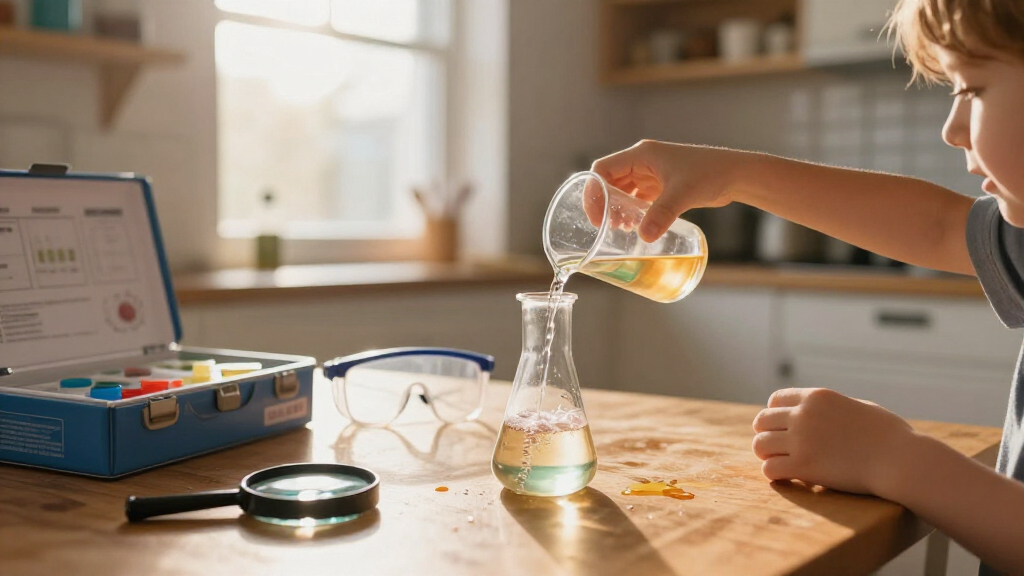
This guide walks you through the complete process of running a science experiment kit with a child: choosing the right kit for their age and interests, preparing a workspace, working through the experiments step by step, and confirming that each activity produced the expected result. It is written for parents, grandparents, teachers, and caregivers who want a hands-on science activity to go smoothly on the first attempt — no science background required. The task is rated Beginner and takes roughly 45 to 90 minutes for a typical session, depending on the kit and the number of experiments you attempt in one sitting.

Prime made for students and young adults
- Fast, free delivery for dorm and study essentials
- Prime Video and Amazon Music included
- Member-only deals
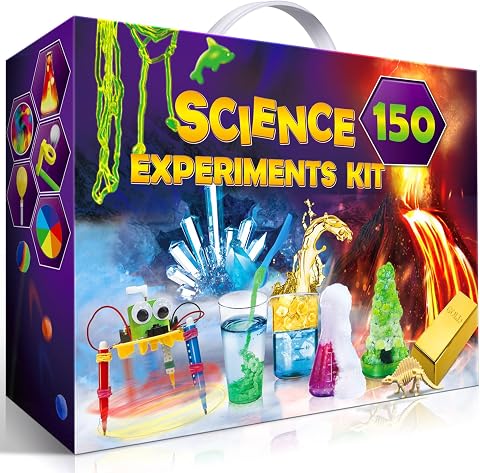
UNGLINGA 150 Experiments Science Kit for Kids – Chemistry Lab STEM Toys
- ✔ Brand: UNGLINGA
- ✔ Number of Experiments: 150
- ✔ Age Range: 8 years and up
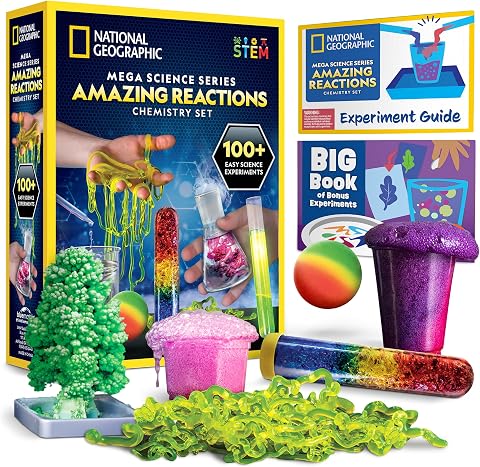
National Geographic Amazing Chemistry Set – 100+ Science Experiments for Kids Ages 8-12
- ✔ Brand: Blue Marble (National Geographic)
- ✔ Model Number: NGMEGACHEMAR
- ✔ Recommended Age: 8 years and up

National Geographic Science Magic Kit with 100+ Experiments for Kids
- ✔ Brand: Blue Marble (National Geographic)
- ✔ Model Number: NGMEGAMAGIC
- ✔ Recommended Age: 8 years and up
By the end, you will have completed at least one experiment with a visible, verifiable outcome — a color change, a growing crystal, a launched balloon rocket, or whatever your specific kit promises — and you will know how to repeat the process for the remaining experiments in the box.
Difficulty: Beginner | Time: 45-90 minutes (plus 30 minutes of shopping and prep)
What You’ll Need
Tools & Materials:
- A commercial science experiment kit appropriate for the child’s age (chemistry, crystal growing, volcano, slime, electronics, or general science)
- A flat, washable work surface (kitchen table, counter, or covered desk)
- Protective covering: newspaper, a plastic tablecloth, or a baking tray with edges
- Paper towels or a dish towel for spills
- A bowl or cup of water for rinsing, plus access to a sink
- Safety glasses or sunglasses if the kit includes or recommends them
- Common household items many kits require: vinegar, baking soda, food coloring, scissors, tape, measuring spoons, or a microwave (check the kit’s requirements list before starting)
- A timer or phone stopwatch for timed experiments
Knowledge:
- Ability to read and follow printed step-by-step instructions
- Basic kitchen measuring skills (teaspoons, milliliters, cups)
- No prior science knowledge is needed — the kit’s manual provides the explanations
Before you buy or open anything, read the kit’s age recommendation and its list of required-but-not-included items. Many kits advertise “over 20 experiments” but only include supplies for a handful without additional household materials. Check the box or manual for the household items list and gather them before the child sits down — mid-experiment trips to the pantry are the most common cause of a stalled session.
UNGLINGA 150 Experiments Science Kit for Kids – Chemistry Lab STEM Toys
The UNGLINGA 150 Experiments Science Kit earns our top spot because it delivers the most complete all-around experience: 150 experiments spanning chemistry, physics, earth science, and surface tension, paired with a well-illustrated step-by-step manual and kid-sized lab tools including safety goggles. Compared with the National Geographic Amazing Chemistry Set, UNGLINGA trades some tool authenticity for topic variety — your child isn’t limited to chemistry, which matters enormously for kids whose interests shift week to week.The illustrated manual is the quiet standout here. Both National Geographic kits lean on bonus booklets that require household sourcing, whereas UNGLINGA’s core experience is designed around experiments a child can largely work through with what’s in the box plus common pantry staples. That said, some experiments still call for additional household items, and the 8-and-up age recommendation is firm — younger siblings will need an adult running the show rather than assisting.This pick makes the most sense for families who want longevity. If your child burns through single-topic kits in a weekend, the sheer volume here keeps the kit relevant for months.
Pros:
- 150 experiments across chemistry, physics, earth science, and surface tension offer the most variety of the three kits
- Step-by-step illustrated manual lets kids work independently
- Includes lab tools, materials, and safety goggles for an authentic scientist feel
- Broadest topic coverage keeps kids engaged longer than single-subject kits
Cons:
- Some experiments require additional household items not in the box
- Ages 8 and up only; younger children need close adult supervision
- Tools are kid-friendly rather than genuine lab-grade equipment
Best for: Kids aged 8+ who want maximum variety across multiple science topics and parents who want a kit that lasts
Not ideal for: Families with children under 8, or buyers who specifically want professional-grade chemistry glassware
Bottom line: The best all-around pick thanks to unmatched experiment variety and a clear, kid-friendly manual that keeps young scientists coming back.
“The best all-around pick thanks to unmatched experiment variety and a clear, kid-friendly manual that keeps young scientists coming back.”
National Geographic Amazing Chemistry Set – 100+ Science Experiments for Kids Ages 8-12
Where UNGLINGA goes broad, the National Geographic Amazing Chemistry Set goes deep. Its defining feature is the inclusion of real scientific tools — test tubes, beakers, and pipettes — that make a child feel like an actual chemist rather than a crafter. The 15 core experiments, from crystal tree growing to color-changing bubbling solutions, are the most substantive structured chemistry in this lineup, and they’re backed by an award-winning brand with a U.S.-based support team.The honest tradeoff: that "100+" number deserves an asterisk. Only 15 experiments are fully supported by included materials; the other 85 live in a bonus guide that leans on household items. Compared with the UNGLINGA kit’s 150 experiments, the hands-on, materials-included experience is actually narrower — but each core experiment is more polished and more genuinely instructive. Compared with the Science Magic Kit from the same brand, this set is better suited to kids who want to learn chemistry rather than perform tricks.This model makes the most sense for a child who has shown sustained interest in science and will appreciate proper equipment over sheer volume.
Pros:
- Includes genuine lab tools: test tubes, beakers, and pipettes
- 15 well-designed core chemistry experiments with real scientific payoff
- Bonus guide extends the kit with 85 additional household-item experiments
- Award-winning brand backed by a U.S. support team
Cons:
- Only 15 experiments have materials fully included; the rest require household items
- Narrower included experience than the UNGLINGA kit despite the 100+ claim
- Younger children will need adult supervision for most experiments
Best for: Kids ages 8-12 with a genuine interest in chemistry who want authentic lab equipment and structured experiments
Not ideal for: Buyers expecting 100+ ready-to-run experiments out of the box, or kids who prefer variety over depth
Bottom line: The deepest and most authentic chemistry experience of the three, best for kids who care about learning the science, not just the spectacle.
“The deepest and most authentic chemistry experience of the three, best for kids who care about learning the science, not just the spectacle.”
National Geographic Science Magic Kit with 100+ Experiments for Kids
Some kids don’t want to follow a lab procedure — they want to amaze an audience. The National Geographic Science Magic Kit is built for exactly that child: 20 magic experiments with all materials included, each one designed to be performed and then explained. It’s the only kit in this lineup where the core experience needs no extra shopping, which gives it a genuine practical edge over both the UNGLINGA kit and its chemistry-set sibling.Compared with the Amazing Chemistry Set from the same brand, the Magic Kit sacrifices real lab tools and deep chemistry instruction in exchange for showmanship and immediate payoff. And compared with UNGLINGA’s 150 experiments, its included-experiment count is far smaller — the 85+ bonus experiments in the booklet require separately sourced materials. But that’s missing the point: this kit’s job is to hook a child who thinks science is boring by letting them levate, transform, and astonish first, then reveal the chemistry behind it.It’s also a smart pick for social kids — the trick format works beautifully as a family demonstration or a show for friends, something neither competitor is designed around.
Pros:
- All materials included for the 20 core experiments — no extra shopping required
- Magic-trick format is uniquely effective at engaging science-averse kids
- Bonus booklet adds 85+ additional experiments for extended use
- Award-winning brand with manufacturer warranty and 30-day return guarantee
Cons:
- Only 20 experiments have materials included, far fewer than the other kits’ core offerings
- Less genuine chemistry instruction than the Amazing Chemistry Set
- Bonus experiments require separately sourced household materials
Best for: Kids who respond better to performing and showmanship than lab procedures, and parents who want an open-the-box-and-go experience
Not ideal for: Kids seeking in-depth chemistry learning or the longest possible experiment runway
Bottom line: The best entry point for kids who need to be entertained before they’re educated — a genuinely complete out-of-the-box experience built around performance.
“The best entry point for kids who need to be entertained before they’re educated — a genuinely complete out-of-the-box experience built around performance.”
As an Amazon Associate we earn from qualifying purchases.
Before You Start
Safety first: Always supervise children during experiments, especially any involving chemicals, heat, small parts, or balloons. Read the kit’s safety warnings on the box and in the manual before the child touches anything. Some chemistry kits contain substances that must not be ingested, inhaled, or mixed with anything other than the instructed ingredients. Confirm the child washes their hands before and after every session.
Choose your session scope in advance: pick one to three experiments for the first sitting rather than attempting the whole kit. Young children lose focus after 30 to 45 minutes, and a successful short session builds enthusiasm for the next one. Lay out all materials before inviting the child to the table so their attention goes straight into the activity.
Pick a workspace you can clean easily and that is far from carpet, fabric furniture, and electronics. Dye-based and chemical kits can permanently stain surfaces and clothing. Have the child wear old clothes or an apron if the experiments involve colorants.
Step-by-Step Instructions
Step 1: Choose a kit matched to the child’s age and interests
Check the age rating printed on the box and match it to the child’s actual age, not their reading level or enthusiasm. For ages 4 to 7, choose kits with large parts, single-step reactions, and visual payoffs like color changes or bubbling volcanoes. For ages 8 to 10, choose multi-step kits such as crystal growing, slime science, or basic circuits. For ages 11 and up, chemistry sets with real reagents, dissection kits, or electronics kits with solder-free breadboards work well.
Before buying, open the kit’s product description or read the back of the box and confirm it lists the number of experiments, included materials, and required household items. Avoid kits that do not publish this information.
Tip: Kits themed around something the child already likes — volcanoes, gemstones, rockets, or slime — hold attention far longer than generic “science” kits.
Check: You have a kit whose age rating matches the child and whose box clearly states what is included and what you must supply.
Step 2: Read the entire manual and gather all materials
Sit down alone with the kit manual and read the instructions for the experiment you plan to do, from start to finish, before involving the child. Note every required item, every measurement, and every wait time. Then gather everything — kit components plus household items — and arrange it on your covered work surface in the order it will be used.
Pour or measure nothing yet. This step is preparation only: you are building a picture of the full procedure so you can guide the child without pausing to read mid-experiment.
Tip: Some crystal-growing and polymer experiments require overnight waits or hot water. If your chosen experiment has a wait time, tell the child in advance so the delay is expected rather than disappointing.
Check: Every item listed in the experiment’s instructions is on the table, and you can describe the full procedure from memory or a quick glance.
Step 3: Set up a safe, contained workspace
Cover the work surface with newspaper or a plastic tablecloth, or work on a baking tray with raised edges to contain spills. Place paper towels, a rinse cup of water, and an empty waste bag or bin within arm’s reach. Put safety glasses on the child if the kit includes them, and tie back long hair if any experiment involves flame, spinning parts, or chemicals.
Move the session away from food preparation areas if you are using chemical reagents, or thoroughly wipe the surface afterward before any food touches it.
Tip: Take two or three photos of the clean setup. Having a reference image makes the next session’s setup take half the time.
Check: The workspace is covered, all supplies are reachable without leaving the chair, and safety gear is on.
Step 4: Walk the child through the setup steps as the narrator
Before starting, ask the child to predict what will happen — this turns the experiment into a real test rather than a demonstration. Then guide them through each numbered setup step from the manual. Have the child perform every action they safely can: measuring, pouring, stirring, and positioning. You handle anything involving hot water, sharp tools, or restricted chemicals.
Read each step aloud, then let the child do it. Resist doing the steps yourself — the learning and the enjoyment come from their hands doing the work, even when the pour is imperfect.
Tip: If a measurement must be exact, guide the child’s hand or use the kit’s measuring tools rather than eyeballing. Failed experiments are usually measurement failures.
Check: The setup matches the manual’s illustration or description, and the child can say what they are about to test.
Step 5: Run the experiment and observe carefully
Execute the final action — the pour, the drop, the mix, the switch-on — and start a timer if the manual specifies one. Watch the reaction together and describe out loud what you both see: color, bubbles, temperature, movement, sound. If the kit includes an observation section or worksheet, have the child draw or write what happened while it is fresh.
Do not rush to the next experiment. Spending two or three minutes discussing why the result matched or missed the child’s prediction is where the actual science learning happens. If the kit manual explains the science, read that explanation now, in plain terms.
Tip: Film the reaction on your phone. Slow-motion playback of a bubbling reaction or rocket launch is a highlight for kids and a useful record if the result was ambiguous.
Check: The reaction produced the visible result the manual described — bubbling, color change, growth, glow, motion, or measurement — and the child recorded or described the observation.
Step 6: Clean up and store the kit for the next session
Dispose of used chemical mixtures exactly as the manual instructs — most kid-safe kits allow disposal down a sink with plenty of water, but some reagents must go in the trash instead. Never pour unknown mixtures down the drain without checking. Wipe the surface, rinse all reusable tools like beakers and stirrers, and dry them.
Return unused chemicals and components to the kit box, seal any bags of powder or tablets, and store the kit in a cool, dry place out of younger children’s reach. Note on the manual or the box which experiments you have completed and which remain.
Tip: Have the child participate in cleanup from the first session — it keeps the activity sustainable for you and models real laboratory practice.
Check: The workspace is restored to normal, nothing is stained or damaged, and the kit is packed with remaining materials accounted for.
Common Mistakes to Avoid
- Substituting measurements or ingredients based on guesswork — Use only the quantities and substances the manual specifies. Doubling baking soda “for a bigger volcano” or swapping dish soap for hand soap often kills the reaction entirely. If you are missing an ingredient, stop and get it rather than improvising.
- Starting the experiment before reading all the instructions — Always read the full procedure alone first. Many kits have a critical order of operations — such as adding water to powder rather than powder to water — that is easy to get wrong when reading step-by-step in real time with an excited child waiting.
- Choosing a kit far above or below the child’s age range — Match the printed age rating. A kit that is too advanced leads to the adult doing everything while the child watches; one that is too simple leads to boredom within minutes.
- Leaving experiments with wait times unattended or forgotten — Set a phone alarm for crystal growing, gel experiments, or anything requiring hours to develop. Put a note on the kit with the start time so you can compare growth against the manual’s timeline.
Troubleshooting
Problem: The reaction did not happen — no bubbles, no color change, no growth
Solution: Check three things in order: ingredient freshness (old baking soda or expired reagents lose potency), measurement accuracy (redo with exact amounts), and order of mixing (some reactions require a specific sequence). If all match the manual, retry once with fresh materials before contacting the manufacturer — most reputable kit brands replace failed components on request.
Problem: The result was weak or smaller than the picture on the box
Solution: Box photos are usually staged under ideal conditions. Verify water temperature where specified — many reactions need warm, not cold, water — and confirm you used the full measured quantity. Weak results are usually under-measured reactants or cold water.
Problem: A powder, dye, or liquid spilled on clothing or the table
Solution: Blot — do not rub — with a damp cloth immediately, then wash the fabric with cold water and detergent. Check the kit’s safety sheet for the specific substance; most kid-kit dyes are washable but set permanently if heat-dried. Flush any chemical off skin with running water for several minutes.
Problem: The child loses interest halfway through a multi-step experiment
Solution: Pause at the next natural break rather than forcing completion. Cover the in-progress setup with plastic wrap, and resume within the same day. For future sessions, choose shorter experiments first and save long ones for when attention is highest.
What Success Looks Like
The session is successful when all of the following are true: at least one experiment produced the visible outcome its instructions described; the child performed the hands-on steps themselves and made a prediction before the result; the observation was discussed or recorded; the workspace was cleaned without stains or damage; and the remaining kit materials are stored and labeled for the next session. If the experiment failed despite following the manual exactly, the session still counts as real science — record what happened, form a new guess about why, and run a corrected trial. Testing a failed prediction and trying again is the core scientific skill you want the child to walk away with.
Next Steps
Plan the next session within a week while enthusiasm is high. Pull out the manual, pick the next one to three experiments, and apply the same preparation routine — full read-through first, materials gathered second, child invited third. As the child grows comfortable, gradually hand over more responsibility: let them read the steps aloud, do their own measuring, and lead the observation notes.
Once the kit is exhausted, branch out based on what they enjoyed most. A child who loved chemistry kits can move to larger reagent sets or kitchen-science books; a fan of circuits can graduate to snap-circuit or beginner electronics kits; a crystal enthusiast can try rock tumbling or mineral identification sets. Keep a simple notebook of every experiment completed — it becomes a portfolio the child will be proud of, and it makes an excellent addition to school science discussions.
Frequently Asked Questions
What age is appropriate to start science experiment kits?
Most children can start with supervised kits around age 4 to 5, using kits rated for preschool that involve color mixing, magnets, or simple reactions. From age 8, children can handle multi-step kits with minimal help. Always follow the printed age rating and supervise regardless of age whenever chemicals, heat, or small parts are involved.
Are the chemicals in kids’ experiment kits safe?
Kits from reputable manufacturers use child-safe substances such as baking soda, citric acid, and food-grade dyes, and they comply with toy safety standards. They are safe when used exactly as instructed. The risks come from ingestion, eye contact, and unauthorized mixing — which is why adult supervision is required and hands should be washed after every session. Read the safety sheet in the kit before starting.
The kit says I need items not included in the box. Is that normal?
Yes, and almost every kit does this to keep costs down. Common additions are vinegar, baking soda, cooking oil, food coloring, scissors, and tape. The required list is printed on the box or the first page of the manual — gather everything before the session begins so the activity does not stall halfway through.
Can one kit be shared between two children?
Yes, if you assign roles: one child measures while the other pours, then swap for the next experiment. Kits with consumable supplies (powders, tablets, dyes) may only support one full run of each experiment, so check the quantity before promising both children a turn at the same activity. Buying two of an inexpensive kit avoids most conflicts.
How do I explain the science if I don’t understand it myself?
Use the explanation section in the kit manual — it is written for non-scientists and covers the key idea in a few sentences. If a child asks something the manual does not answer, look it up together. Modeling “let’s find out” is more valuable to a child than a perfect explanation, and it teaches them how real scientists work.
Halloween Picks
halloween
As an affiliate, we earn on qualifying purchases.